20x20 Kylo Ren Pixel Art 20x20 First Order Pixel Art
INTRODUCTION TO PIXEL ART
Computer graphics and digital fine art equally nosotros know them today have a root, and that is pixel art.
Back in the 24-hour interval, there wasn't a 'Pixel Fine art' fashion because every art fabricated on a reckoner needed to exist pixel-by-pixel artwork.
Equally computers evolved, the capability to render images became more than avant-garde, enabling digital artists to create without the limitations of old hardware.
Creating fine art with these limitations in mind is the core of pixel art as an art class.
While no longer a necessary approach, forcing yourself to create in the boundaries of an old technology or set up of techniques can help you as an
artist.
Below are some examples of my exploration with pixel fine art.
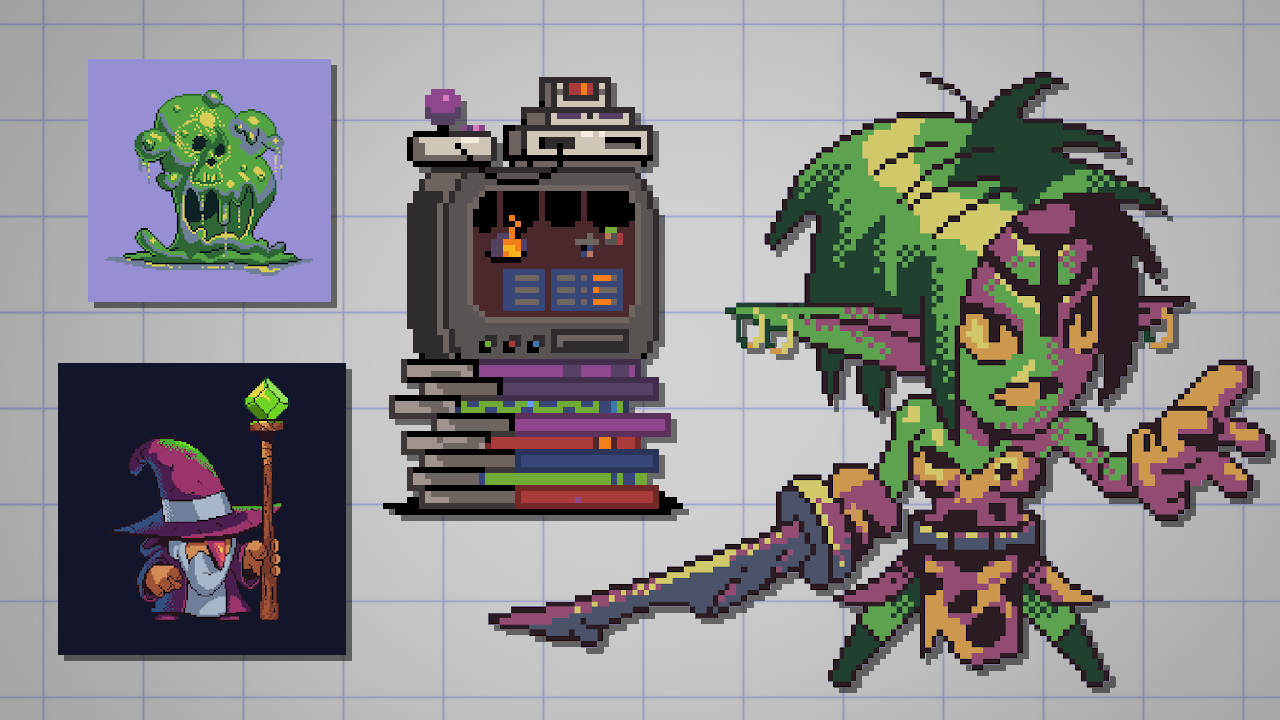
In this article, I'll highlight some characteristics, bones techniques and guidelines so you can start making your own pixel art.
All the information here tin exist applied to any 'style' and any software. And that'south the beauty of this bailiwick.
The technical side of this art course is important, particularly if you want to brand an homage of a video game.
But call back that you don't need to force yourself to create a 32×32 pixel size artwork with only 3 colors, if you lot don't want to.
It'southward beneficial to respect the fundamentals and the techniques of quondam-school digital artists – simply it's not obligatory to piece of work like them.
LEARNING BY DOING
For this article, we'll work on an approachable claiming.
I want you to create a 64×64 pixel portrait.
That's it!
You can draw yourself, make a fanart or invent a character.
The goal is to create an artwork that tin can be used used equally a social media avatar.
Start with a small (resolution) file size, so the pixel unit is visible. There'south no signal to making pixel art where the pixels aren't evident.
SETTING UP YOUR Canvass
For this article, I'll be using Clip Studio Pigment.
While there'due south bully dedicated tools for making pixel art, y'all can utilize any drawing plan to follow along.
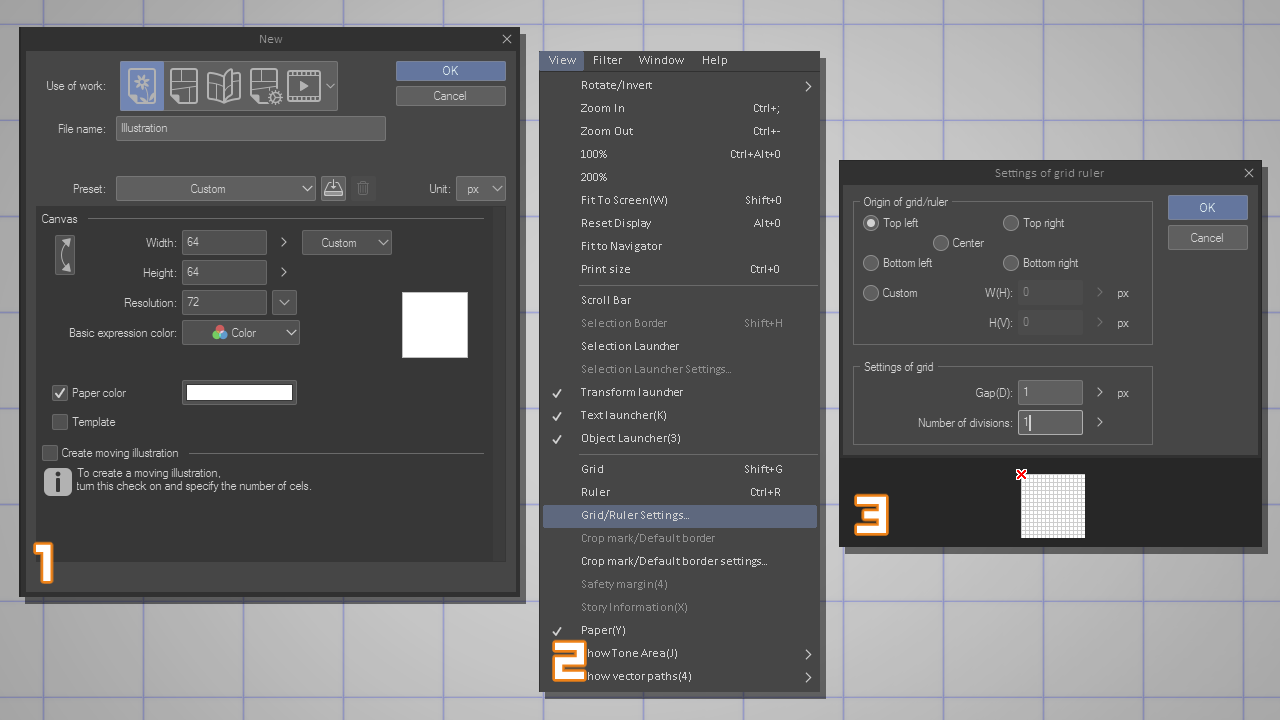
- Create a 64×64 pixel certificate (1);
- Go to View > Grid/Ruler Settings (2);
- Configure every bit the following then you can run into a grid with every unmarried pixel. Y'all tin can turn the grid on/off someday using the Shift+M shortcut. (iii);
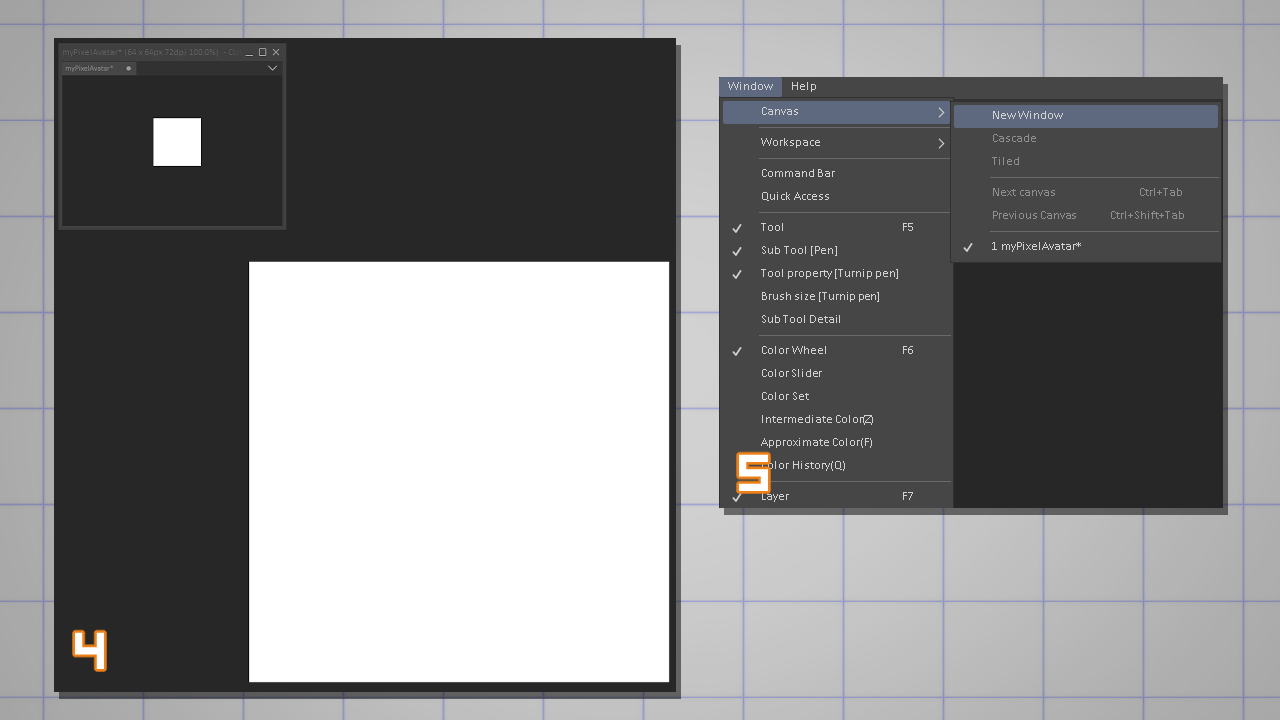
A good practice for working with pixel art is getting used to cartoon zoomed while keeping an eye on the actual-size artwork (4);
To create a secondary view of your current canvass, go to Window > Canvas > New Window and open a new case of the electric current canvass.
Set it to 100% and place in your workspace (5).
CREATING THE PIXEL Art TOOLS
Fourth dimension to introduce a basic concept.
Pixel art does not go along with automatic anti-aliasing.
Anti-aliasing is a useful algorithm that smooths edges of a shape.
This is made by adding an extra row of pixels closest to the aliased border.
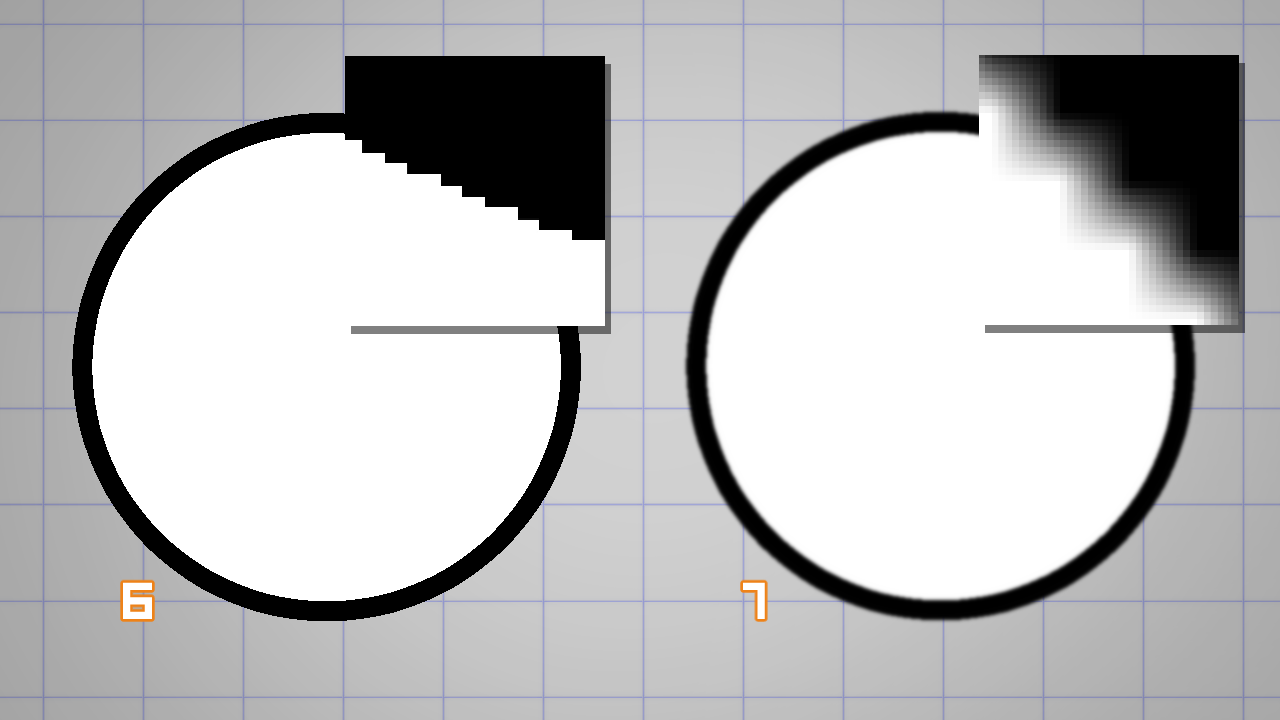
Equally you lot can see in the example, the anti-aliased edge (7) has an automatic gradient of pixels to give the shape a smoother profile.
The aliased edge (half dozen) is what we're looking for when creating pixel art. Afterward, we can soften the edges by adding anti-aliasing by hand (manually).
A rule-of-thumb when using any software to create pixel art is to disable the anti-aliasing setting in brushes, tools and transformations.
In Prune Studio Paint you have to turn off anti-aliasing in:
- brushes (8);
- tools similar Selection, Fill, Text, eg. (nine);
- and during any transformation using Edit > Transform (x);

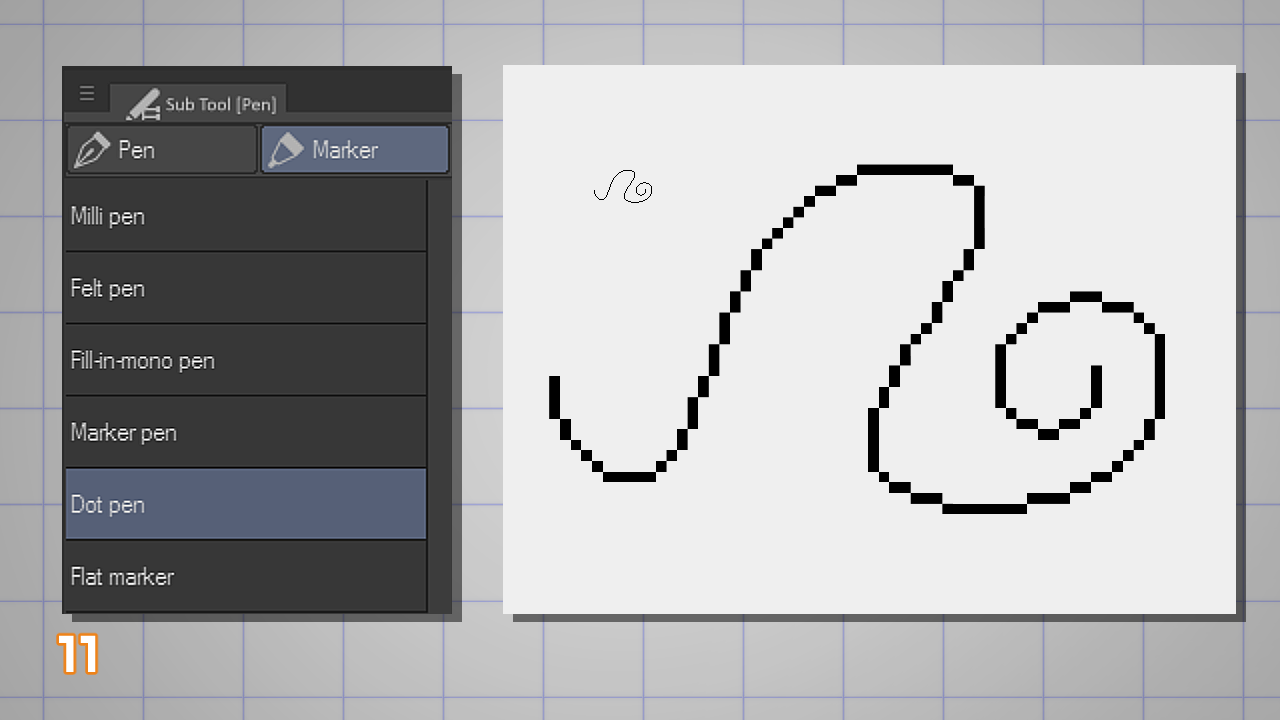
In Clip Studio Paint y'all already have a pixel art pen. It's called 'Dot Pen' in the Mark category (xi).
This is the simplest cartoon brush available. It has a stock-still 1-pixel size, anti-aliasing turned off, and no option for stabilization or color mixing.
I suggest you follow along this tutorial using this castor only.
Subsequently in the game, yous tin indistinguishable whatever of your 'common' brushes and utilize information technology for pixel art (as long you reduce brush size to lower values and disable anti-aliasing).
DRAWING THE LINEART
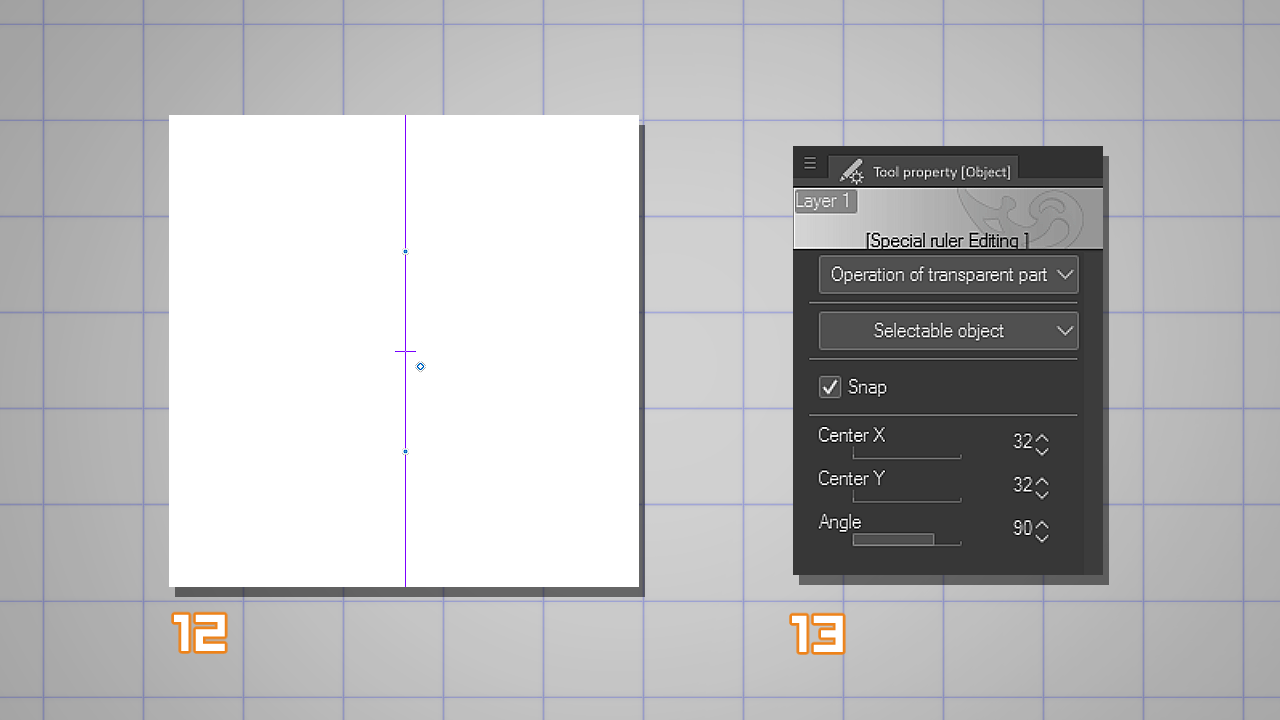
Since this volition exist a front-facing portrait, I'll get-go the drawing using the Symmetrical Ruler (12);
Place the Symmetrical Ruler on the Canvas and, to make sure it'due south on the expressionless-eye, apply the Object tool to select it and input values manually (13);
In this case I changed the Center X and Center Y values to 32, which is one-half of my total canvas size (64 pixels).
Now, select your Dot Pen over again and showtime drawing.
Since this brush can't be resized, it'south a good idea to zoom in on the sail you're cartoon (fifteen) and employ the indistinguishable view as a reference (14).
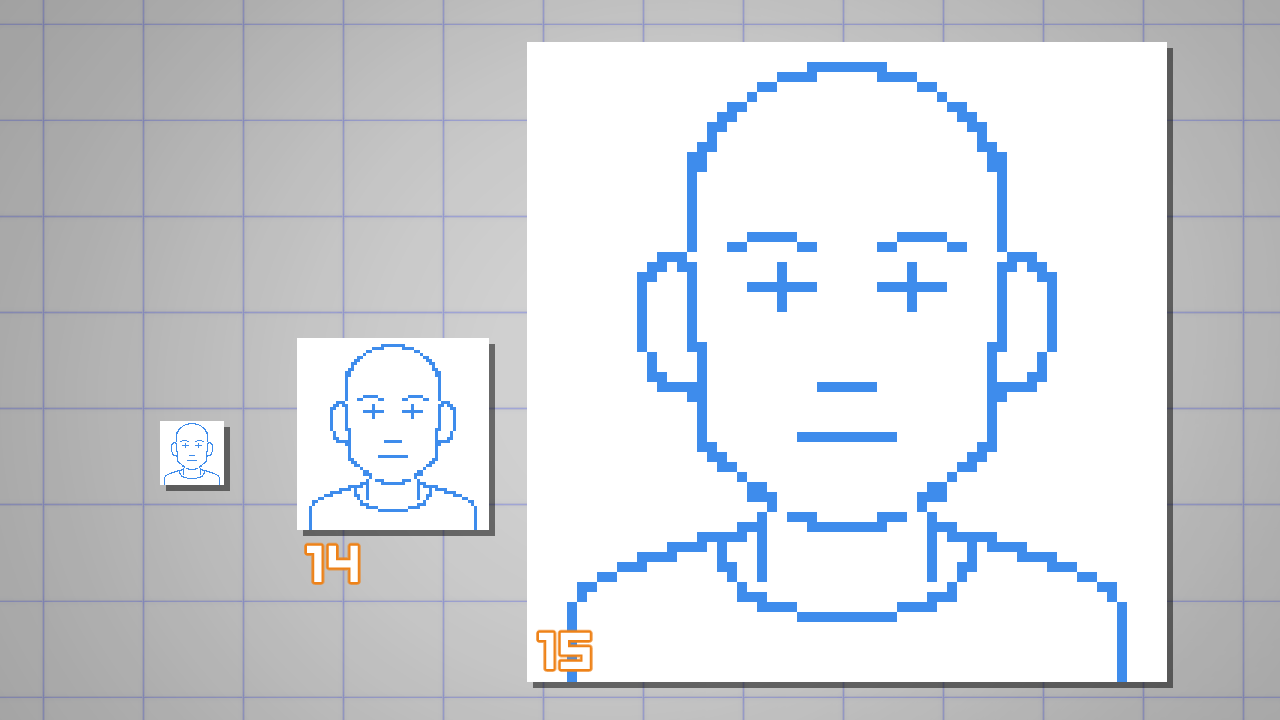
I started my portrait drawing a initial sketch to find the construction of the head (16) and then I started calculation details (17).
At that place'southward no need to use a blue color. I just prefer it considering it helps my brain sympathize that I'1000 creating a rough for my last drawing.

If y'all're done with the sketch you tin can keep with the linework.
Before adding the concluding lines, let me evidence you a unproblematic technique for drawing lines and curves in pixel fine art.
In the instance below, the linework (18) doesn't look smooth considering there's a lot of duplicated pixels where information technology should be a unmarried pixel line.
Yous can set up those 'doubles' (information technology's a term) by removing any adjacent pixels on the curve. In the example (19), I removed all pixels marked in crimson.
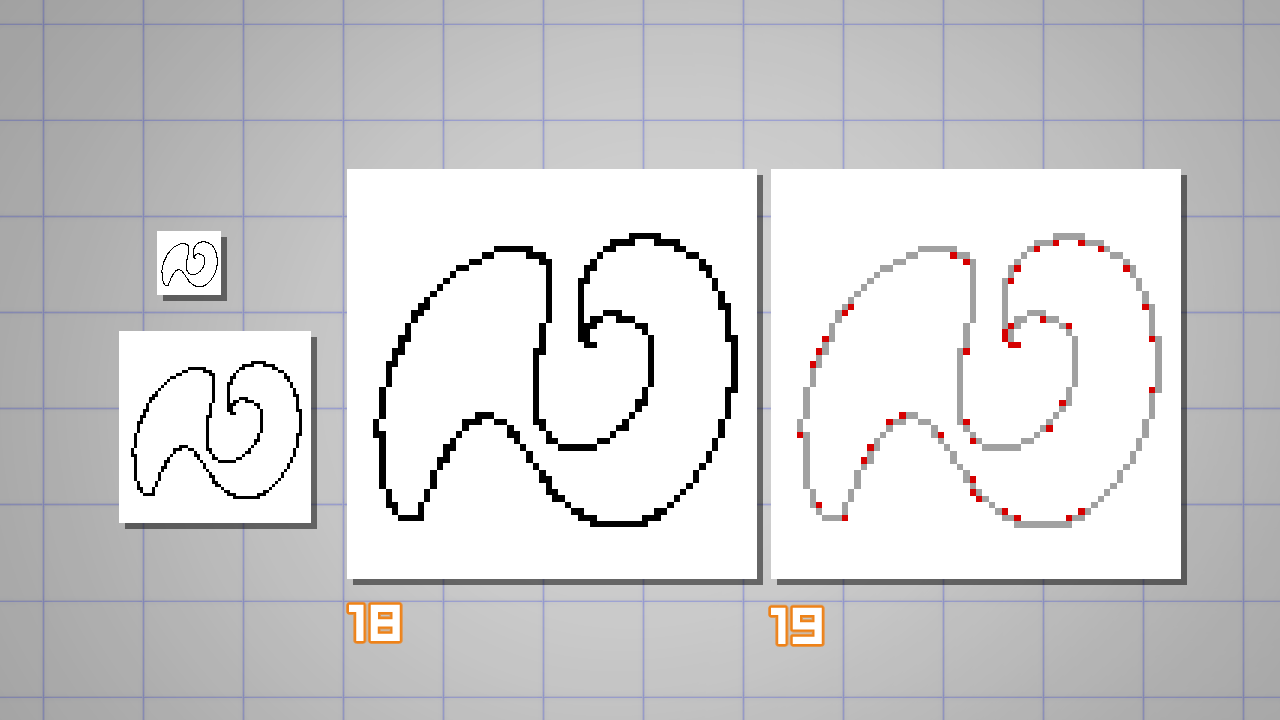
I propose you to return to your sketch and wait out for those 'doubles' to clean your linework.
Do non worry if the curves don't experience right. Merely remove the unwanted pixels.
TIP: if y'all demand to erase a pixel, you can merely switch to the transparent color (I have my shortcut set up to 10);
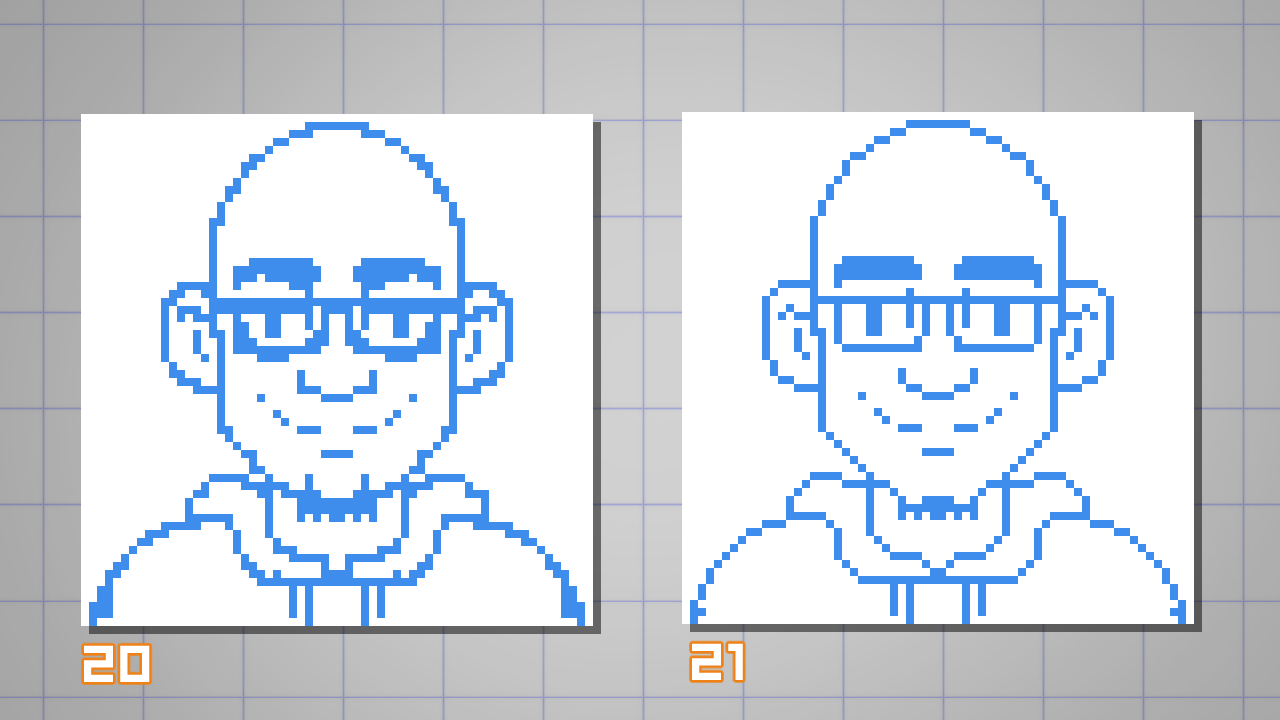
In the example below yous can see the difference of the initial sketch (xx) and the cleaned-up version (21).
Ready for another technique?
Allow's outset fixing the drawing and adjusting some curves.
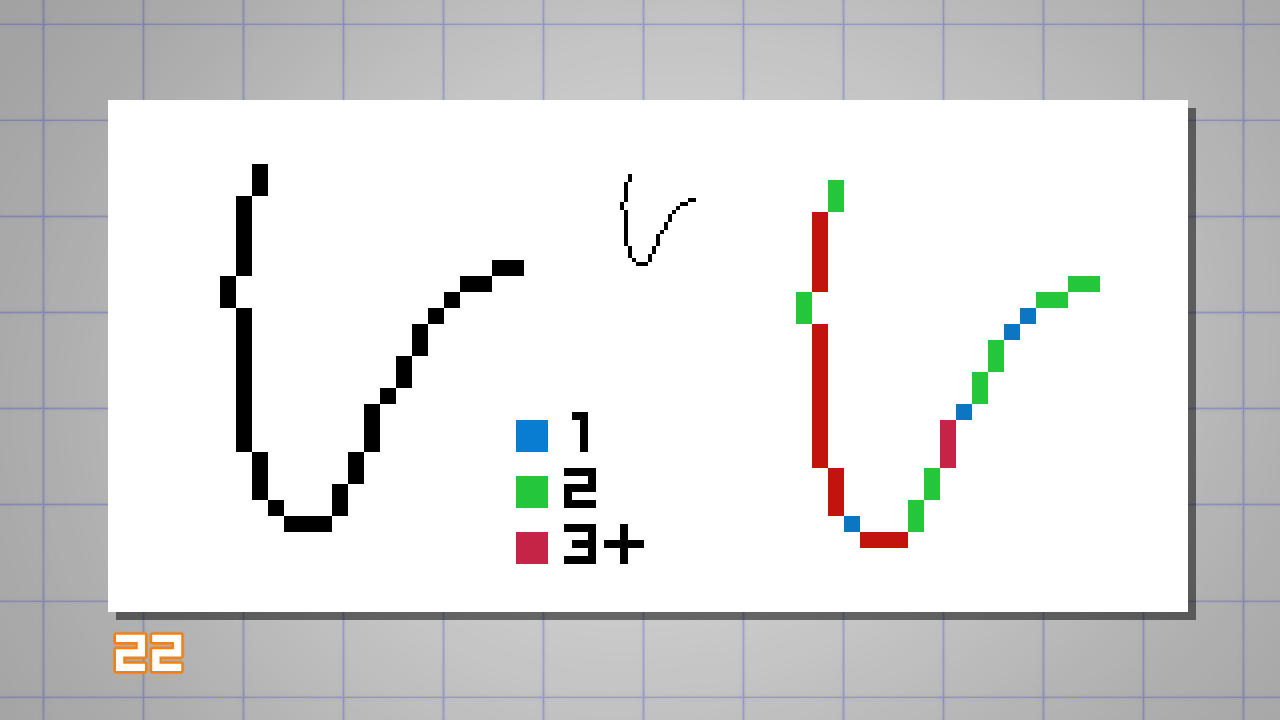
Seeing the example below (22), you tin notice the distribution and spacing of pixels are not post-obit a logical progression. (eg.: 3, 2, ane, 4…)
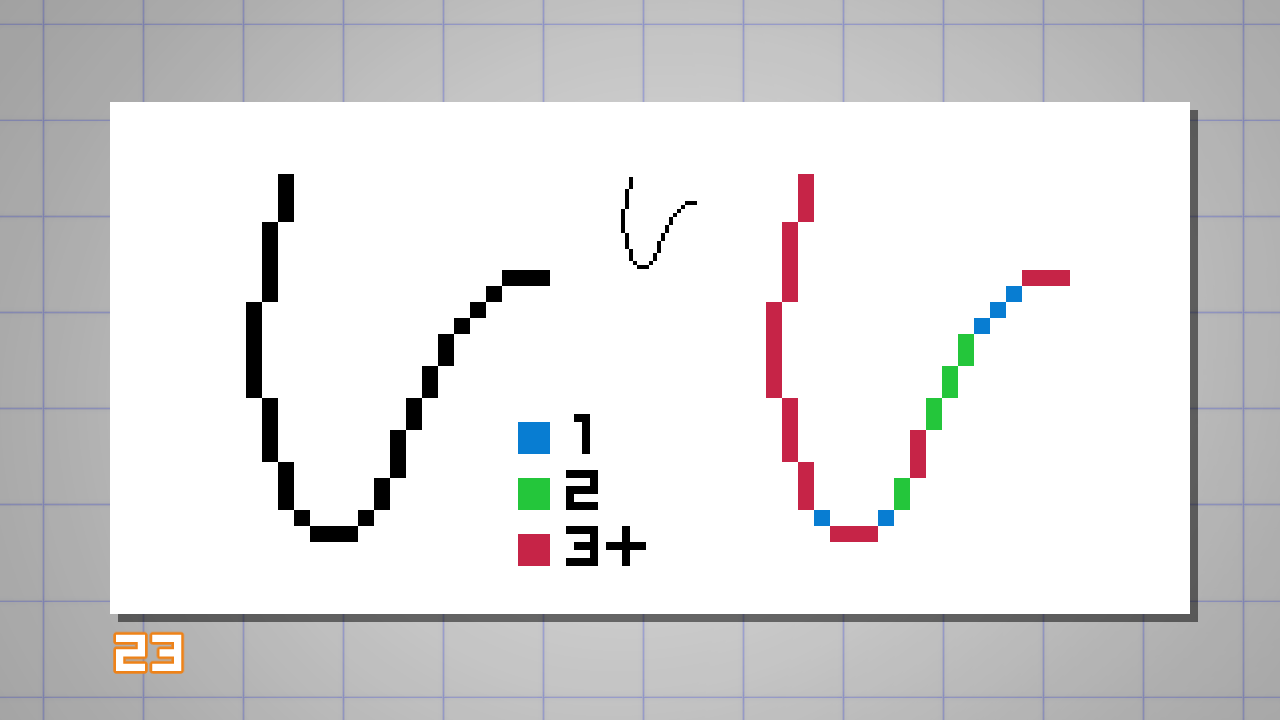
While on this improved version (23), you can encounter a better progression of pixels to create the curve. (eg.: 1, ii, ii, 3…)
With that knowledge, I propose you to attempt the following exercise before standing on your cartoon:
Try to draw some random lines and curves with the two concepts yous simply learned so far: remove the doubles and maintaining the 'pixel progression'.
This will requite you a solid gasp in how to contour shapes in pixel art.
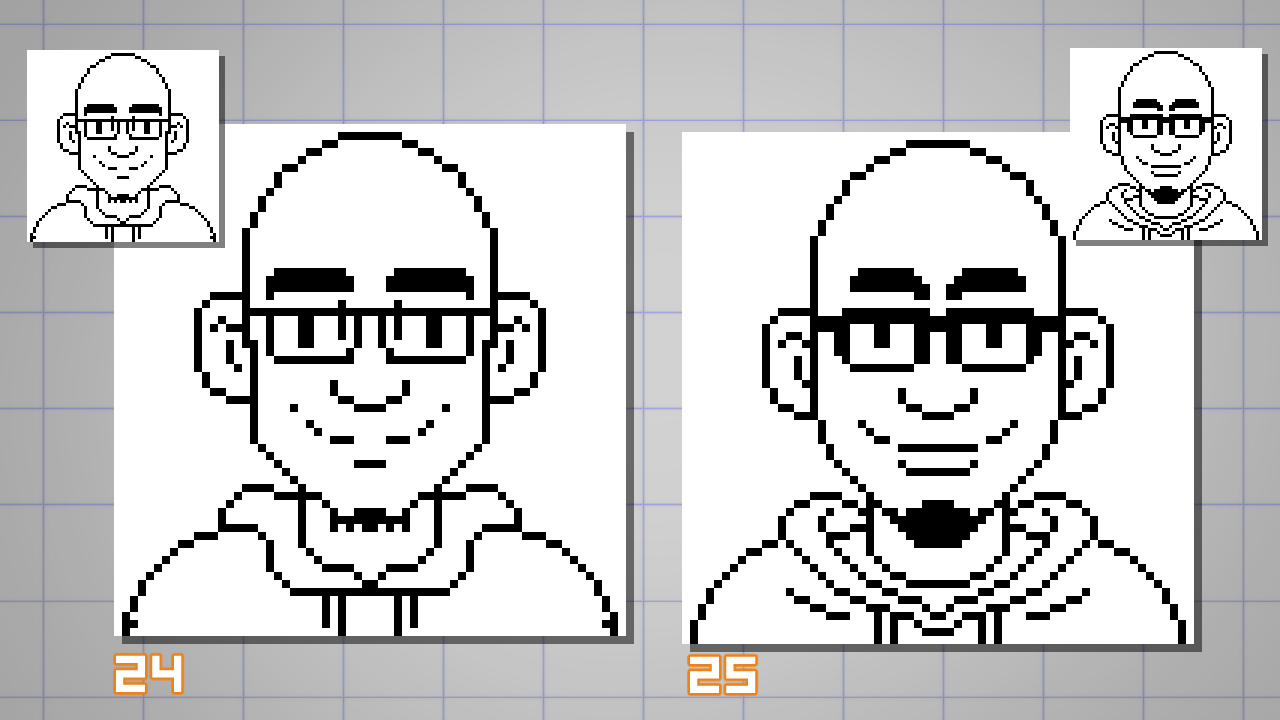
Below is my final linework (25).
I did some pocket-sized adjustments on the proportions and curves, and removed some unnecessary pixels to make the face up more than readable.
Accept some time to compare with the original version (24) and try to notice where I applied the techniques.
COLORING TIME
The number of colors used on a sprite (term used to describe an object in game development), depends by how much you want to stay shut to a specific limitation of an one-time technology.
While not necessary, y'all tin can larn a lot about pixel art by limiting yourself to a minor amount of colors to choose.
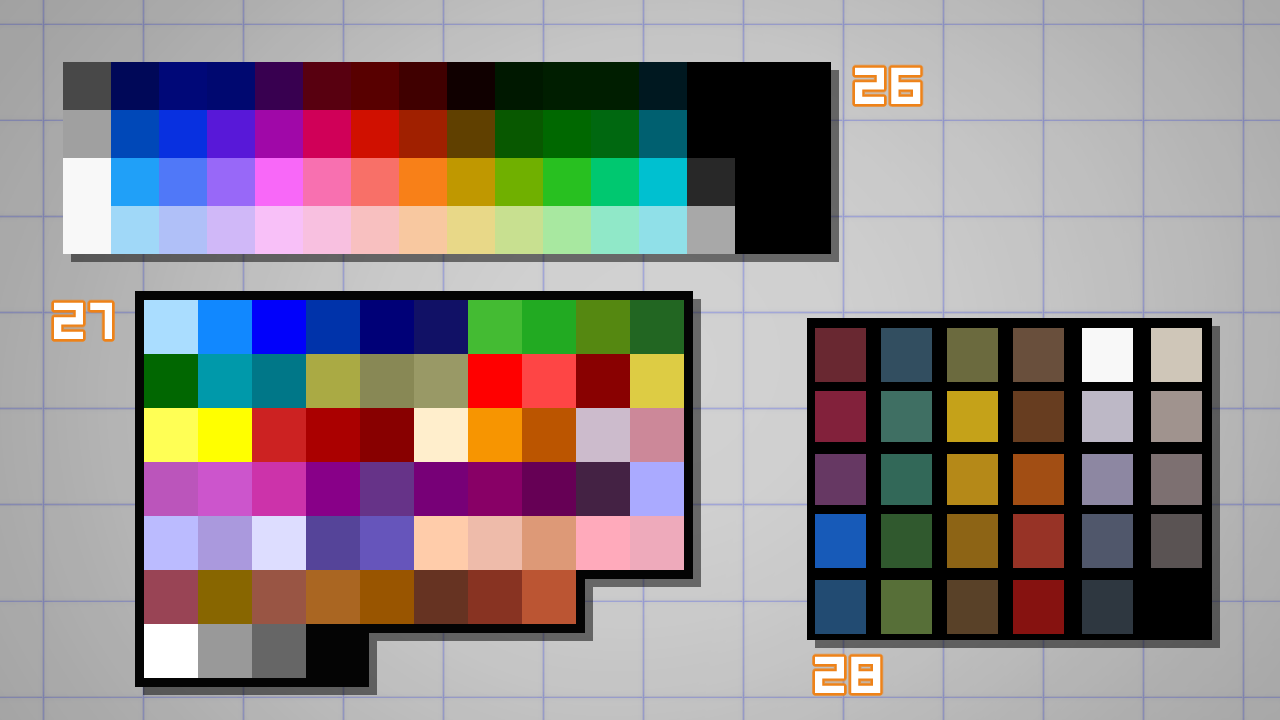
For now I propose y'all start with a simple color palette. As a starting point, you can employ the 56 colors of the palette used by the NES (Nintendo Amusement System) videogame console (26).
The color and tone choices on this palette are not perfect, but it provides a practiced starting point.
In the examples below you have the PC-98 computer color palette (27) and a personal 1 I built in the past (28);
Later y'all tin can start building your own palette, but ever recall to keep it tight and simple.
I starting time by filling my lines with some base colors (flatting).
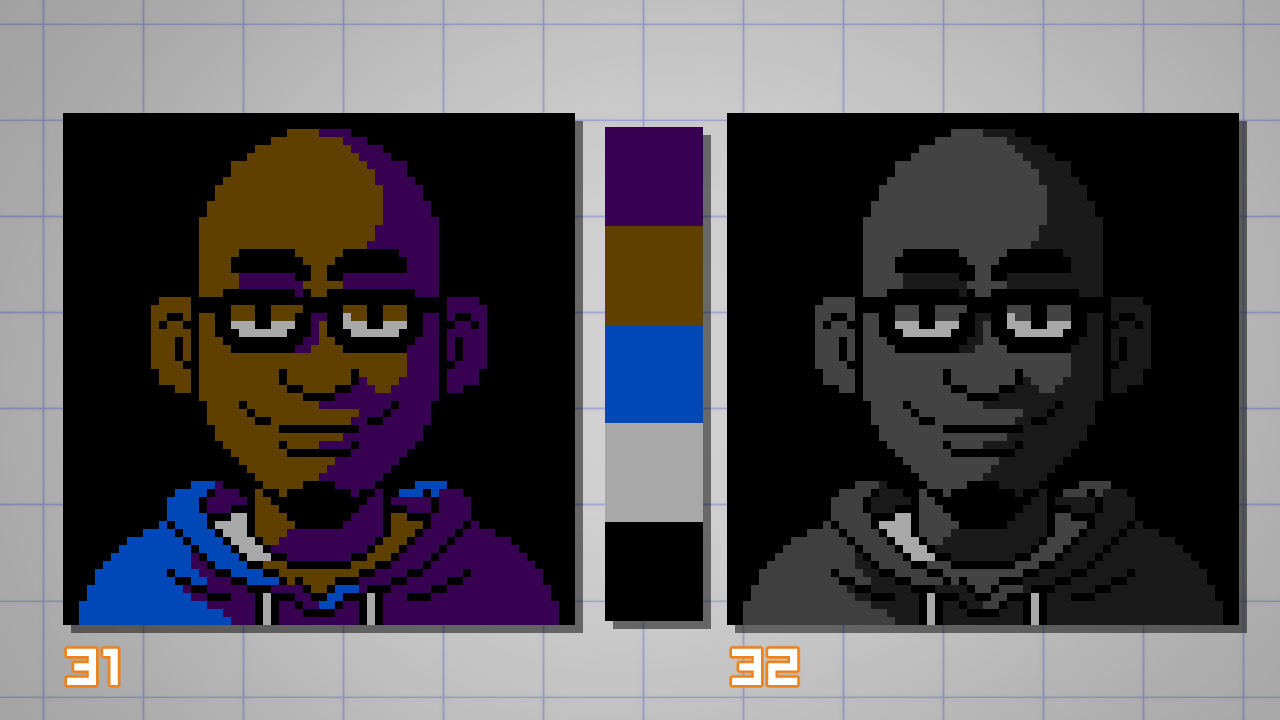
I'm starting with 5 initial colors, including the black linework to paint this portrait (29).
On this stage, recall to configure your Motorcar Select and Fill tools for the pixel art workflow, disabling Expanse Scaling and Anti-aliasing (xxx).

To shade (add together shadows) the pare color on the portrait, you don't need to but apply the darker value of a specific color;
I tin can potentially use any colour bachelor as long the values read correctly.
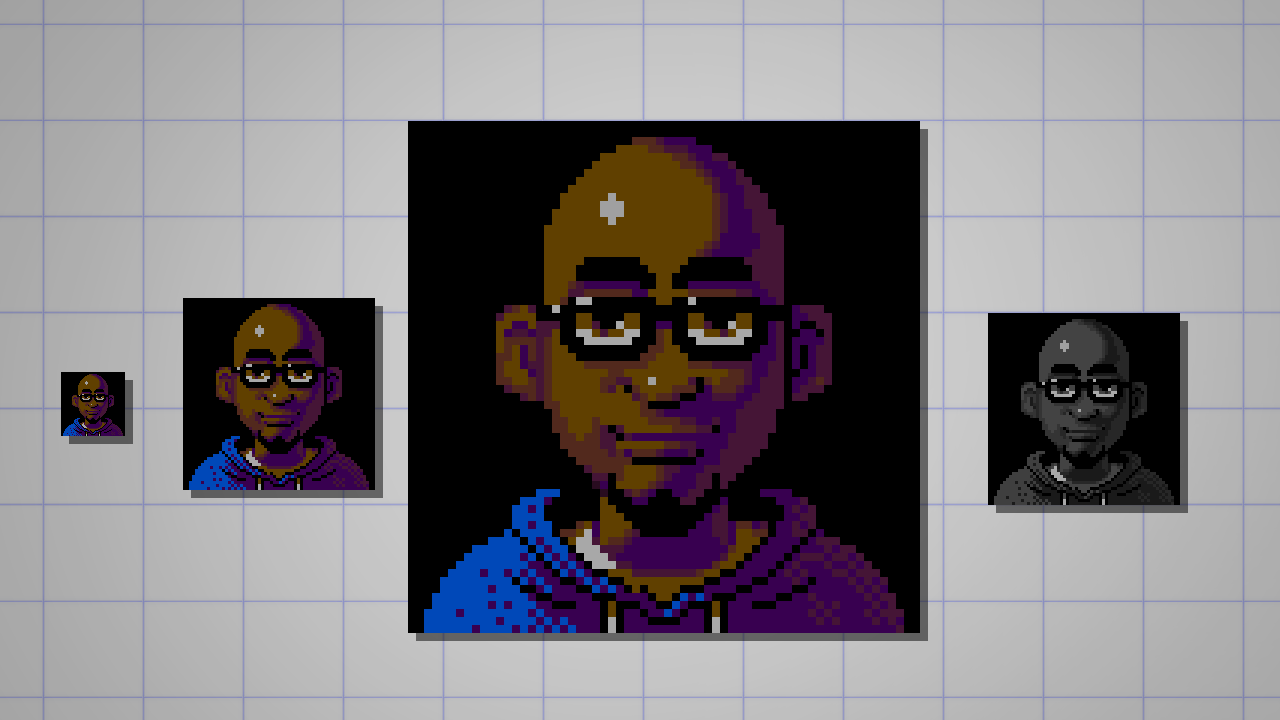
Hither's a tip – Create a new layer on top of your layer stack, fill information technology with black and gear up the layer mode to Color.
Now you can use this layer to check the value relationship of your colors (32).
In the example beneath you tin see how I managed to use the quondam groundwork color (majestic) as the shade colour of my brown skin (31). I prefer to go with a black groundwork to save i colour…
Again, I don't need to – but I'd similar to practise these limitations imposed by the NES color palette.
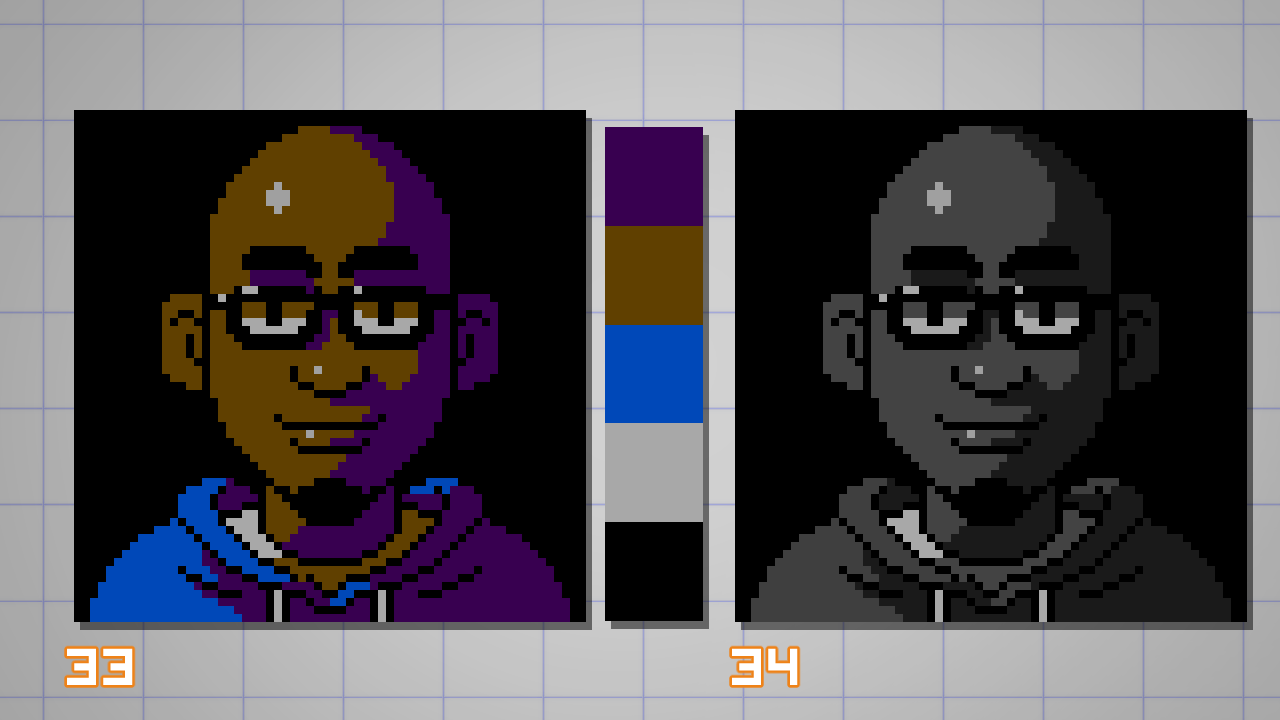
For the highlights on the pare and glasses (33), I don't needed to innovate whatever new colors because, while checking the grayscale values (34),
I noticed the color of the t-shirt could be used for that.
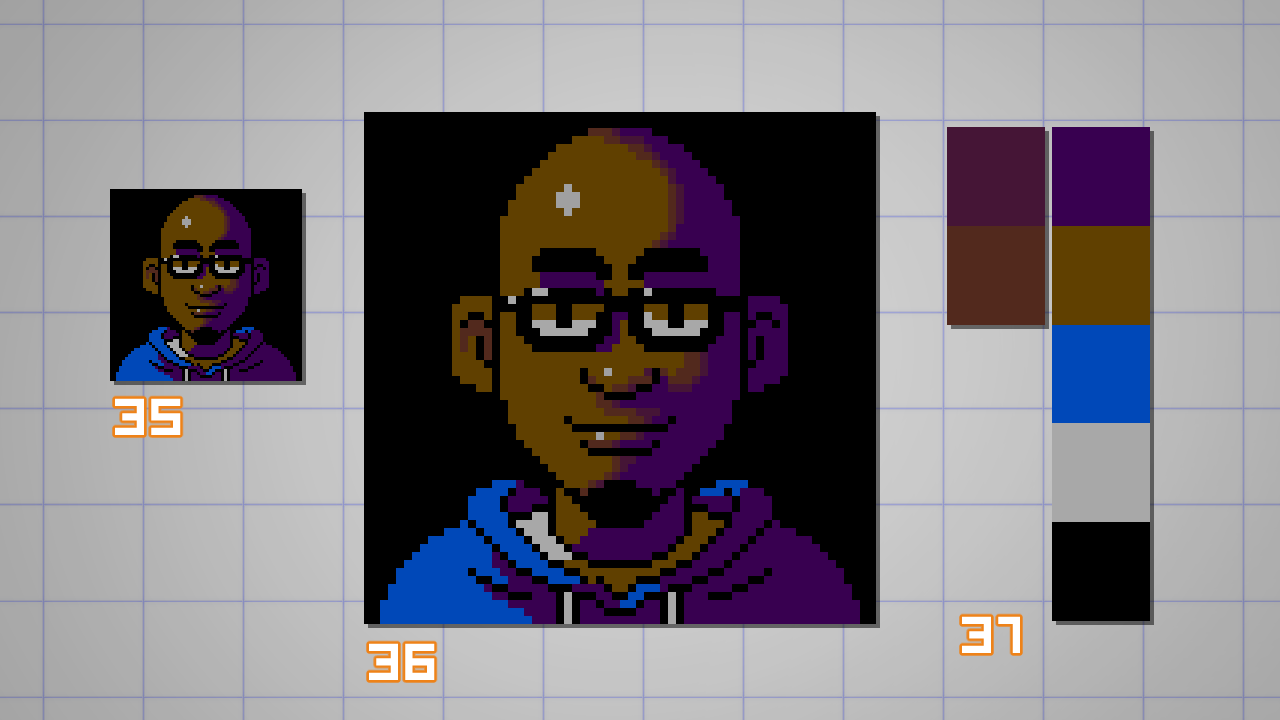
I wanted to add some manual anti-aliasing to smoothen the edge betwixt the lit and shadowed areas of the pare (36).
Using the NES palette only, I could not observe colors that I could use to create this slope transition.
So here's where I abandoned the 'virtual limitations' in favor of the artwork.
In the example I added two new colours (37), so I can add together more details to the shading.
I can't stress this enough, merely it's really important that you make these decisions while looking the artwork through the real, not zoomed-in, canvass size (35).
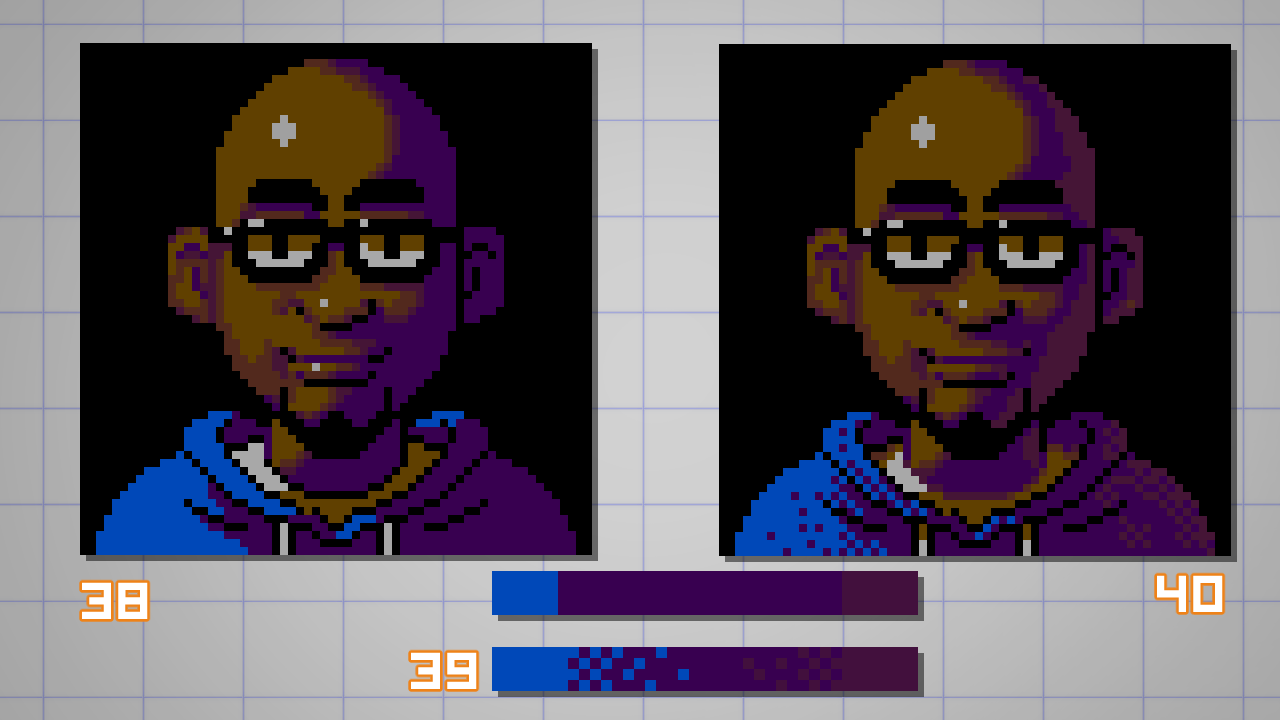
Using the two new extra colors, I increased the rendering on the face adding more than volume, wrinkles ('cause I'm getting quondam) and softening some shadows on the lit side of the portrait (38).
On the blueish jacket, I decided to use the dithering technique to create the sensation of a slope without adding colors (xl).
By breaking up the solid transitions on a checkerboard pattern I can make the illusion of an inbetween color (39).
Dithering is an avant-garde technique and this is just a basic usage for it.
As you tin run into, the event creates a textural effect that can be a problem if used on peel or shine surfaces.
I institute it appropriate to apply in the jacket (made of textile), because I can benefit from the rough texture.
After some tweaking, I managed to fully paint the portrait.
I'm very happy with the last outcome because I could fit a lot of details for a 64×64 pixel size artwork with only 7 colors.
ps.: I too had pixels and colors enough to ready those weird-looking cartoony eyes. X-D
EXPORTING
Final, merely not least…
When saving and exporting pixel fine art, use the GIF or PNG format.
Avoid using the JPEG format, particularly with any level of compression.
This will destroy all the dear and intendance you used to create your pixel art.
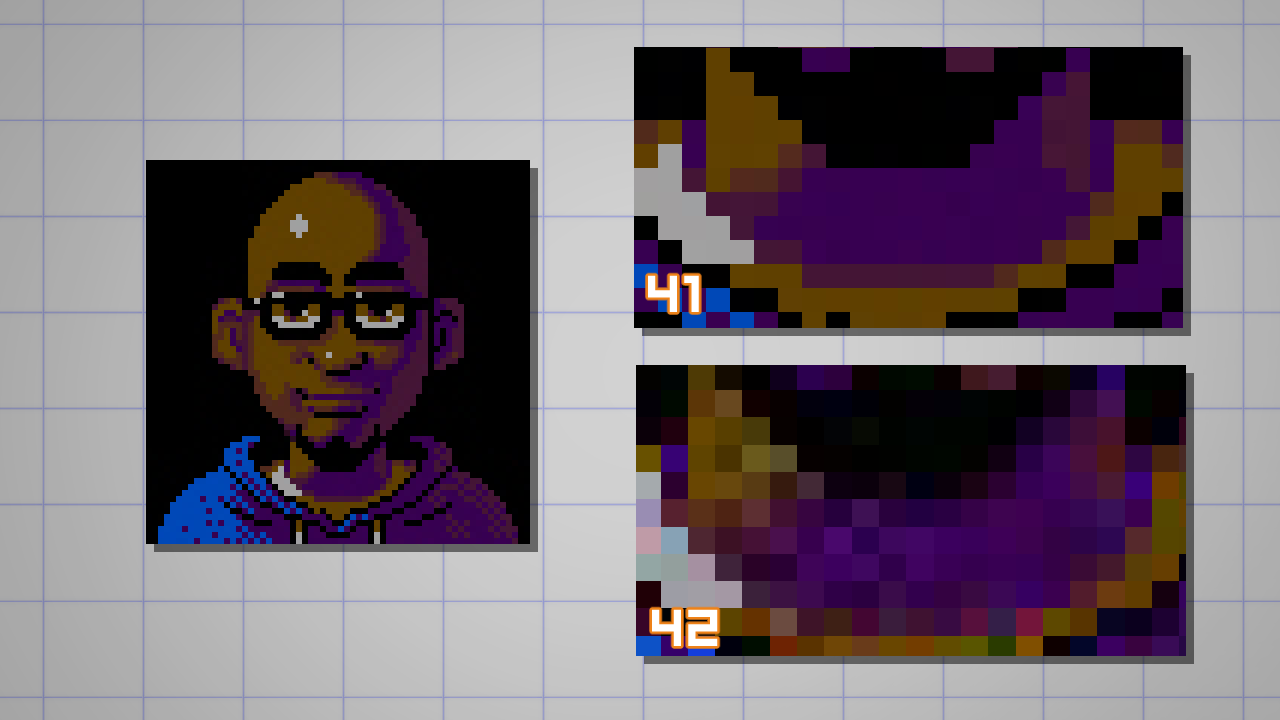
Expect at the examples below: a 99% compressed JPEG (41) may look ok from a distance, but it adds some non-wanted colors.
A 80% compressed version (42) will make any pixel artist bleed. And so please, don't practise that. 🙂
When it comes to posting on social media, you have to deal with the automated-compression of the platform.
For Instagram, you'll have no selection because the system automatically converts and resizes the image to a low-quality jpeg.
On Twitter, you'll accept a sharper, about perfect image if the exported file is 506 pixels wide in PNG format.
That's it.
I promise you enjoyed this tutorial and also hope you managed to create your commencement pixel art portrait.
Beneath yous can detect my minuscule, nevertheless incredible, slice of art. 🙂

If you create yours, delight let me know.
– dado
Artist Profile
Hi. I'm Dado (Dadotronic) Almeida and I draw and pigment 90'due south-videogame-inspired art. As a freelancer artist I create concept and production art for games and animation.My indie career is devoted to personal projects like Claws and Tusks (comic) and artwork that I make for fun or commissions. I besides like to teach and share my discoveries about digital art, reckoner graphics, and mental health for artists.
https://www.dadoalmeida.com/
https://twitter.com/dadotronic
https://world wide web.artstation.com/dadotronic
oliversoutructench.blogspot.com
Source: https://www.clipstudio.net/how-to-draw/archives/161082
Postar um comentário for "20x20 Kylo Ren Pixel Art 20x20 First Order Pixel Art"